3d Resurrection - Getting your Cube 3 Working again
Get link
Facebook
X
Pinterest
Email
Other Apps
Perhaps, like us, you unwittingly chose a Cube 3d Printer for your school or classroom, either because of it's iOS air printing capabilities or because you were sold on the fantasy of it being seamless and simple. LOL... Then, when 3d Systems announced it was discontinuing its line of consumer machines, you may have felt abandoned and hurt and confused. For us, it was a pretty low blow, considering there was no prior announcement about this and we had just purchased one of these bad boys for nearly $800.00; no small amount for a public Middle School.
We may have gotten a lot of distance out of this machine, nonetheless, as we had stockpiled quite a few of the proprietary filament cartridges. If you've used one of these at all, though, you know the filament cartridges are crap, and definitely the weakest link when it comes to this printer. The filament is terrible and you're constantly disassembling and reassembling cartridges. The filament cartridges are also this printers version of DRM, as the machine will not run bulk filament and measures the amount in each cartridge, using some kind of chip.
Hacking the Firmware
So the solution for this problem was provided by Eychei, over at OpenBuilds, who has basically done all the heavy lifting for you on this one. Here is a link to the first release of the Cube Toolbox for Cube 3 and Cube Pro firmware. "By patching the firmware you can stop the counting process of the filament chip and thus use filament of your choice" (Eychei).
I actually recommend that you Download Cube 3 1.14B *PATCHED* firmware file here, and skip trying to run the exe, as your classroom machines are likely as locked down as mine are. Then, Unzip patched firmware file to usb stick and flash firmware by going to Settings -> Firmware screen.
Hacking the filament cartridge.
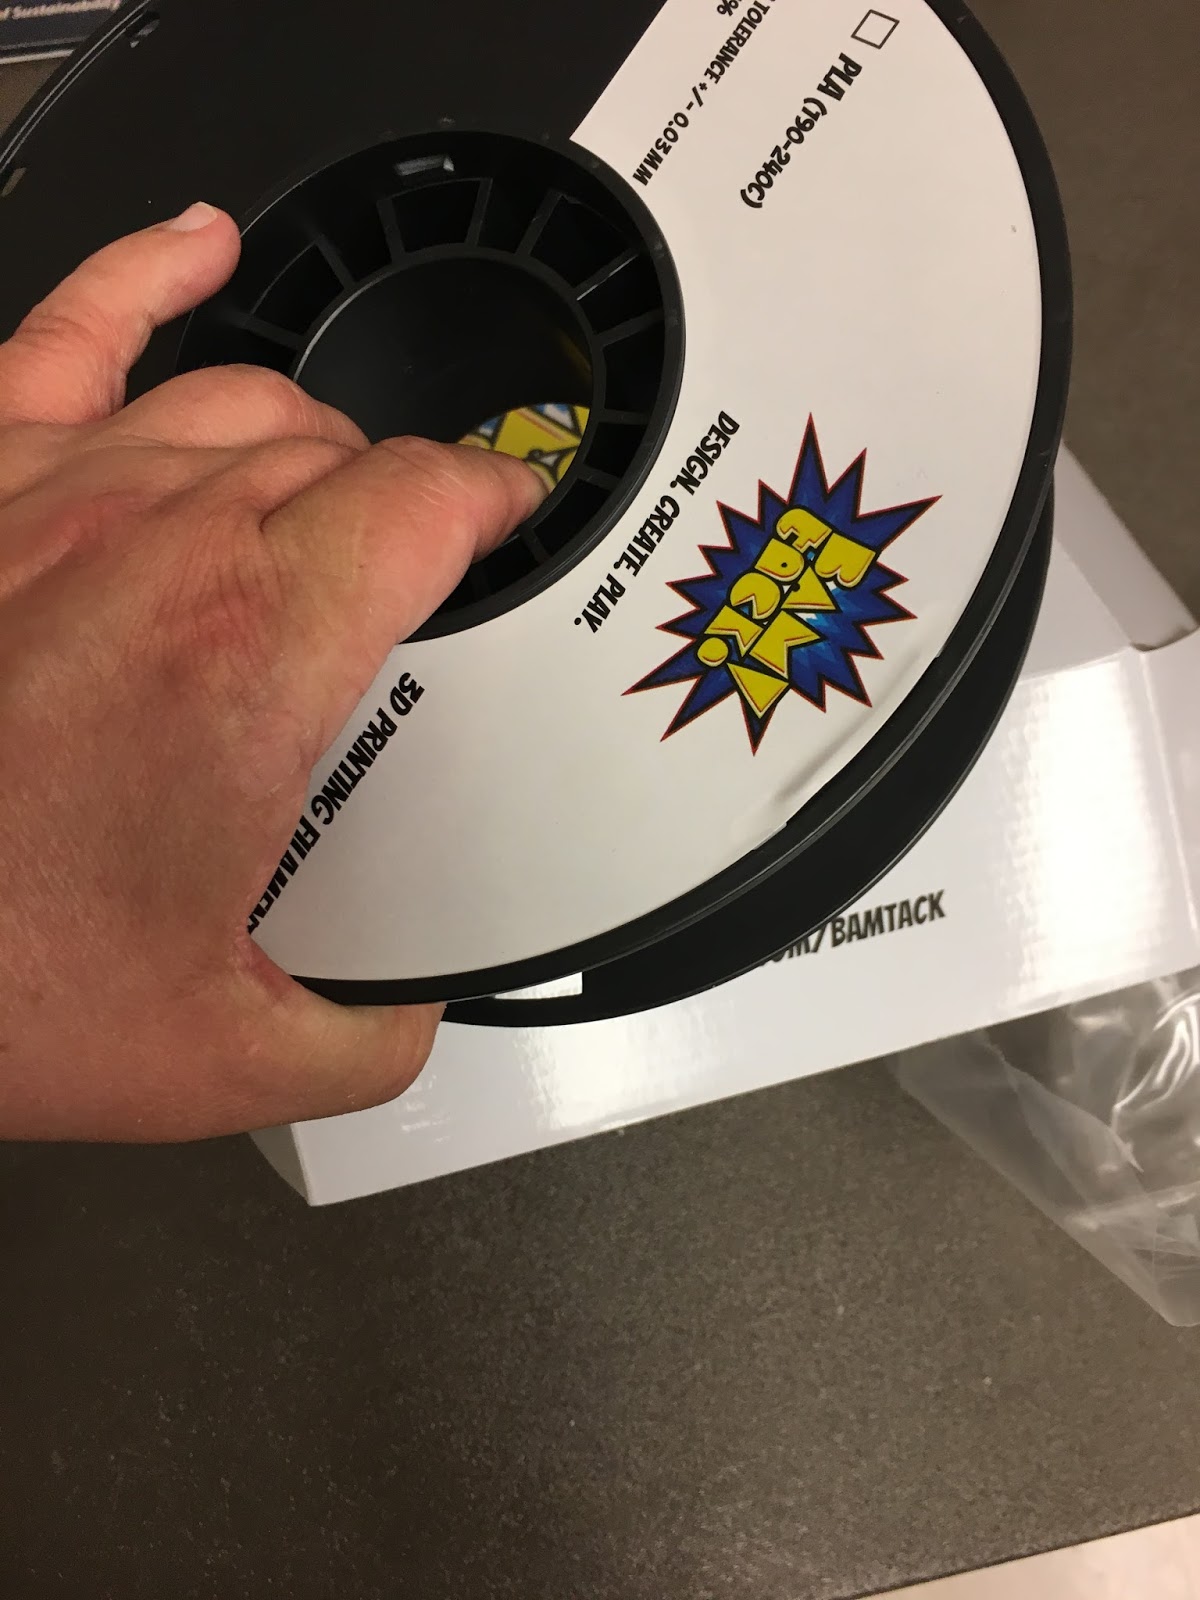
I got the inspiration for my spool set up from Gunspinner, also on OpenBuilds. Below are pictures, of the process I used to "hack" one of my filament cartridges.
First, You need some tools for disassembly.
Follow the directions here for disassembly. Note: I used a flat head screwdrive instead of a lego breaker.
Then, use the lighter to remove excess PLA from the print nozzle.
Now grab a power drill with 1.25" hole saw.
Drill a hole right under the little square window thing
Grab yourself some bulk filament.
Feed it through the top piece you drilled and up into the printer with a T20 x 100mm torx tool.
Snap it all back together.
Swap out your cartridge and print like the boss you are!
As far as the cartridge percentage goes, there is no way to tell, but I've been printing from the same cartridge for 3 years now and have put several spools of regular PLA through it. I have no idea on the power cord.
So, my last post focused on including girls in esports and my willingness to take a hard look at my own mistakes and failings. This post focuses on engaging boys in school through gamification and a company we all love's unwillingness to do the same... on to glory! The success I decided to roll out Classcraft in all of my classes two years ago, and I have found it to be surprisingly effective. I've shared here in the past how not only do students take the health and experience of their characters very seriously, but they also strive to help their teams and classmates in general. One thing that continually surprised me was how much students crave XP (or experience points). Remember, what I do with Classcraft has had no effect on student grades whatsoever. Yet, I've been able to attach points loss / gain consequences to my behavioral and procedural expectations via XP and HP . While these points don't matter in terms of students' grades, they do matter a grea...
Collaboration, it's one of the 21st century skills. There's pretty much unanimous agreement among policy-makers, academic thinkers, and business leaders that collaboration must be a crucial part of our classrooms. Incidentally, there is almost unanimous agreement among teachers and students that group work is painful, cumbersome, annoying, and largely counter-productive. Even popular reality shows rely on group assignments to weed out contestants and create unnecessary drama. Why is something that is so important and crucial to our survival, so painful and dreadful? How can we make it more awesome? What do we do with collaboration? Part 1: Why you hate group work. Before our winter holiday break, I informally polled students in my classes. In all of my sections but one, 100% of my students noted that they hate doing group work. In one class two students said that they love group assignments because they can usually con their group mates into doing all of the work. Wh...
 Perhaps, like us, you unwittingly chose a Cube 3d Printer for your school or classroom, either because of it's iOS air printing capabilities or because you were sold on the fantasy of it being seamless and simple. LOL... Then, when 3d Systems announced it was discontinuing its line of consumer machines, you may have felt abandoned and hurt and confused. For us, it was a pretty low blow, considering there was no prior announcement about this and we had just purchased one of these bad boys for nearly $800.00; no small amount for a public Middle School.


I was just given a Cube3 printer. Do you know where I might find a 4-pin power cord and adapter? Nothing found on eBay.
ReplyDeleteis there any way you can know your Mod is working without having the cartridge at 1%?
ReplyDeleteAs far as the cartridge percentage goes, there is no way to tell, but I've been printing from the same cartridge for 3 years now and have put several spools of regular PLA through it. I have no idea on the power cord.
ReplyDelete